Hello everyone,Rizz here! In this guide, I’ll walk you through the process of Access Your Windows PC from Your Mac Using Microsoft Remote Desktop. We’ll cover all the essential steps to help you Access Your Windows PC from Your Mac. Follow these instructions,Have you ever wished you could access your Windows PC right from your Mac? With Microsoft Remote Desktop, you can make that a reality. This guide will walk you through the simple steps to set up and use Microsoft Remote Desktop to connect your Mac to your Windows PC.
Installing Microsoft Remote Desktop on Your Mac
- Open the Mac App Store: Start by launching the Mac App Store on your Mac.
- Search for Microsoft Remote Desktop: Use the search bar to find the Microsoft Remote Desktop app.
- Install the App: Click Install to download and install the app. It’s free to use.
The app will be installed and ready for use once the download is complete.
Preparing Your Windows PC for Remote Connections

To connect to your Windows PC, you need to enable Remote Desktop:
- Open Settings: On your Windows PC, open the Start menu and go to Settings.
- Navigate to Remote Desktop: Go to System and then click on Remote Desktop.
- Enable Remote Desktop: Toggle the switch to enable Remote Desktop. This feature is available only on Windows 10 or 11 Pro, Enterprise, and Education editions. If you have the Home edition, you won’t see this option.
- Confirm Prompts: Follow any prompts that appear to confirm the settings.
- Note Your PC’s Name and IP Address: Make a note of your PC’s name, and optionally, the IP address. You’ll use this information to connect from your Mac.
Connecting to Your Windows PC from Your Mac
With your Windows PC ready, switch back to your Mac to set up the connection:
- Open Microsoft Remote Desktop: Launch the Remote Desktop app on your Mac.
- Add Your PC: Click on Add PC to start setting up the connection.
- Enter PC Information:
- In the PC Name field, enter either the IP address or the computer name of your Windows PC.
- If you want to save your login details for future use, click on Add User Account and enter your Windows login credentials. Use your Microsoft account details if you log in with a Microsoft account, or your local account details if you use a local account.
- Customize Settings: You can adjust display preferences and other settings according to your needs. Once you’re satisfied with the configuration, click Add.
Connecting to Your Windows PC
- Launch the Connection: Double-click on the newly created PC entry in the Remote Desktop app.
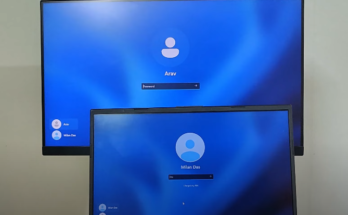
- Authenticate: Click Continue when prompted.
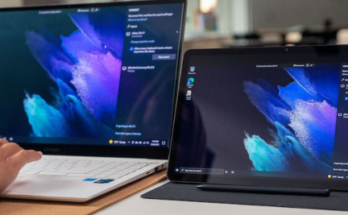
- View Your Windows Desktop: Within a few seconds, your Windows desktop should appear in a new window on your Mac.
Additional Tips
- Local Network Access: This guide focuses on connecting within your local network. For remote access over the Internet, refer to my separate guide linked in the description below.
- Troubleshooting: Ensure both your Mac and Windows PC are connected to the internet and that the Windows PC is powered on and not in sleep mode.